Set up a project
Create a project
Create a project by connecting a repository and choosing the translation files Malmoi should manage.
Before you start: Sign in with a verified email, go to Projects, and choose New project. You can own up to three active projects.
Connect GitHub
- If GitHub is not connected, choose Install GitHub App, or Connect your account if your organization already installed it. If the installation button is unavailable, choose Authorize GitHub App and follow any instruction to ask an administrator for installation access. If repositories are already listed, continue below.
- If the repository is not listed, choose Add repositories to open the app's installation on GitHub. Under Repository access, choose Only select repositories, add the repository, and save.
- If Malmoi shows Waiting for approval, ask an organization owner to approve it, then choose Try again.
- Select the repository, choose the Branch that contains your translation files, and choose Next. This is the base branch that Malmoi reads and opens translation pull requests against.
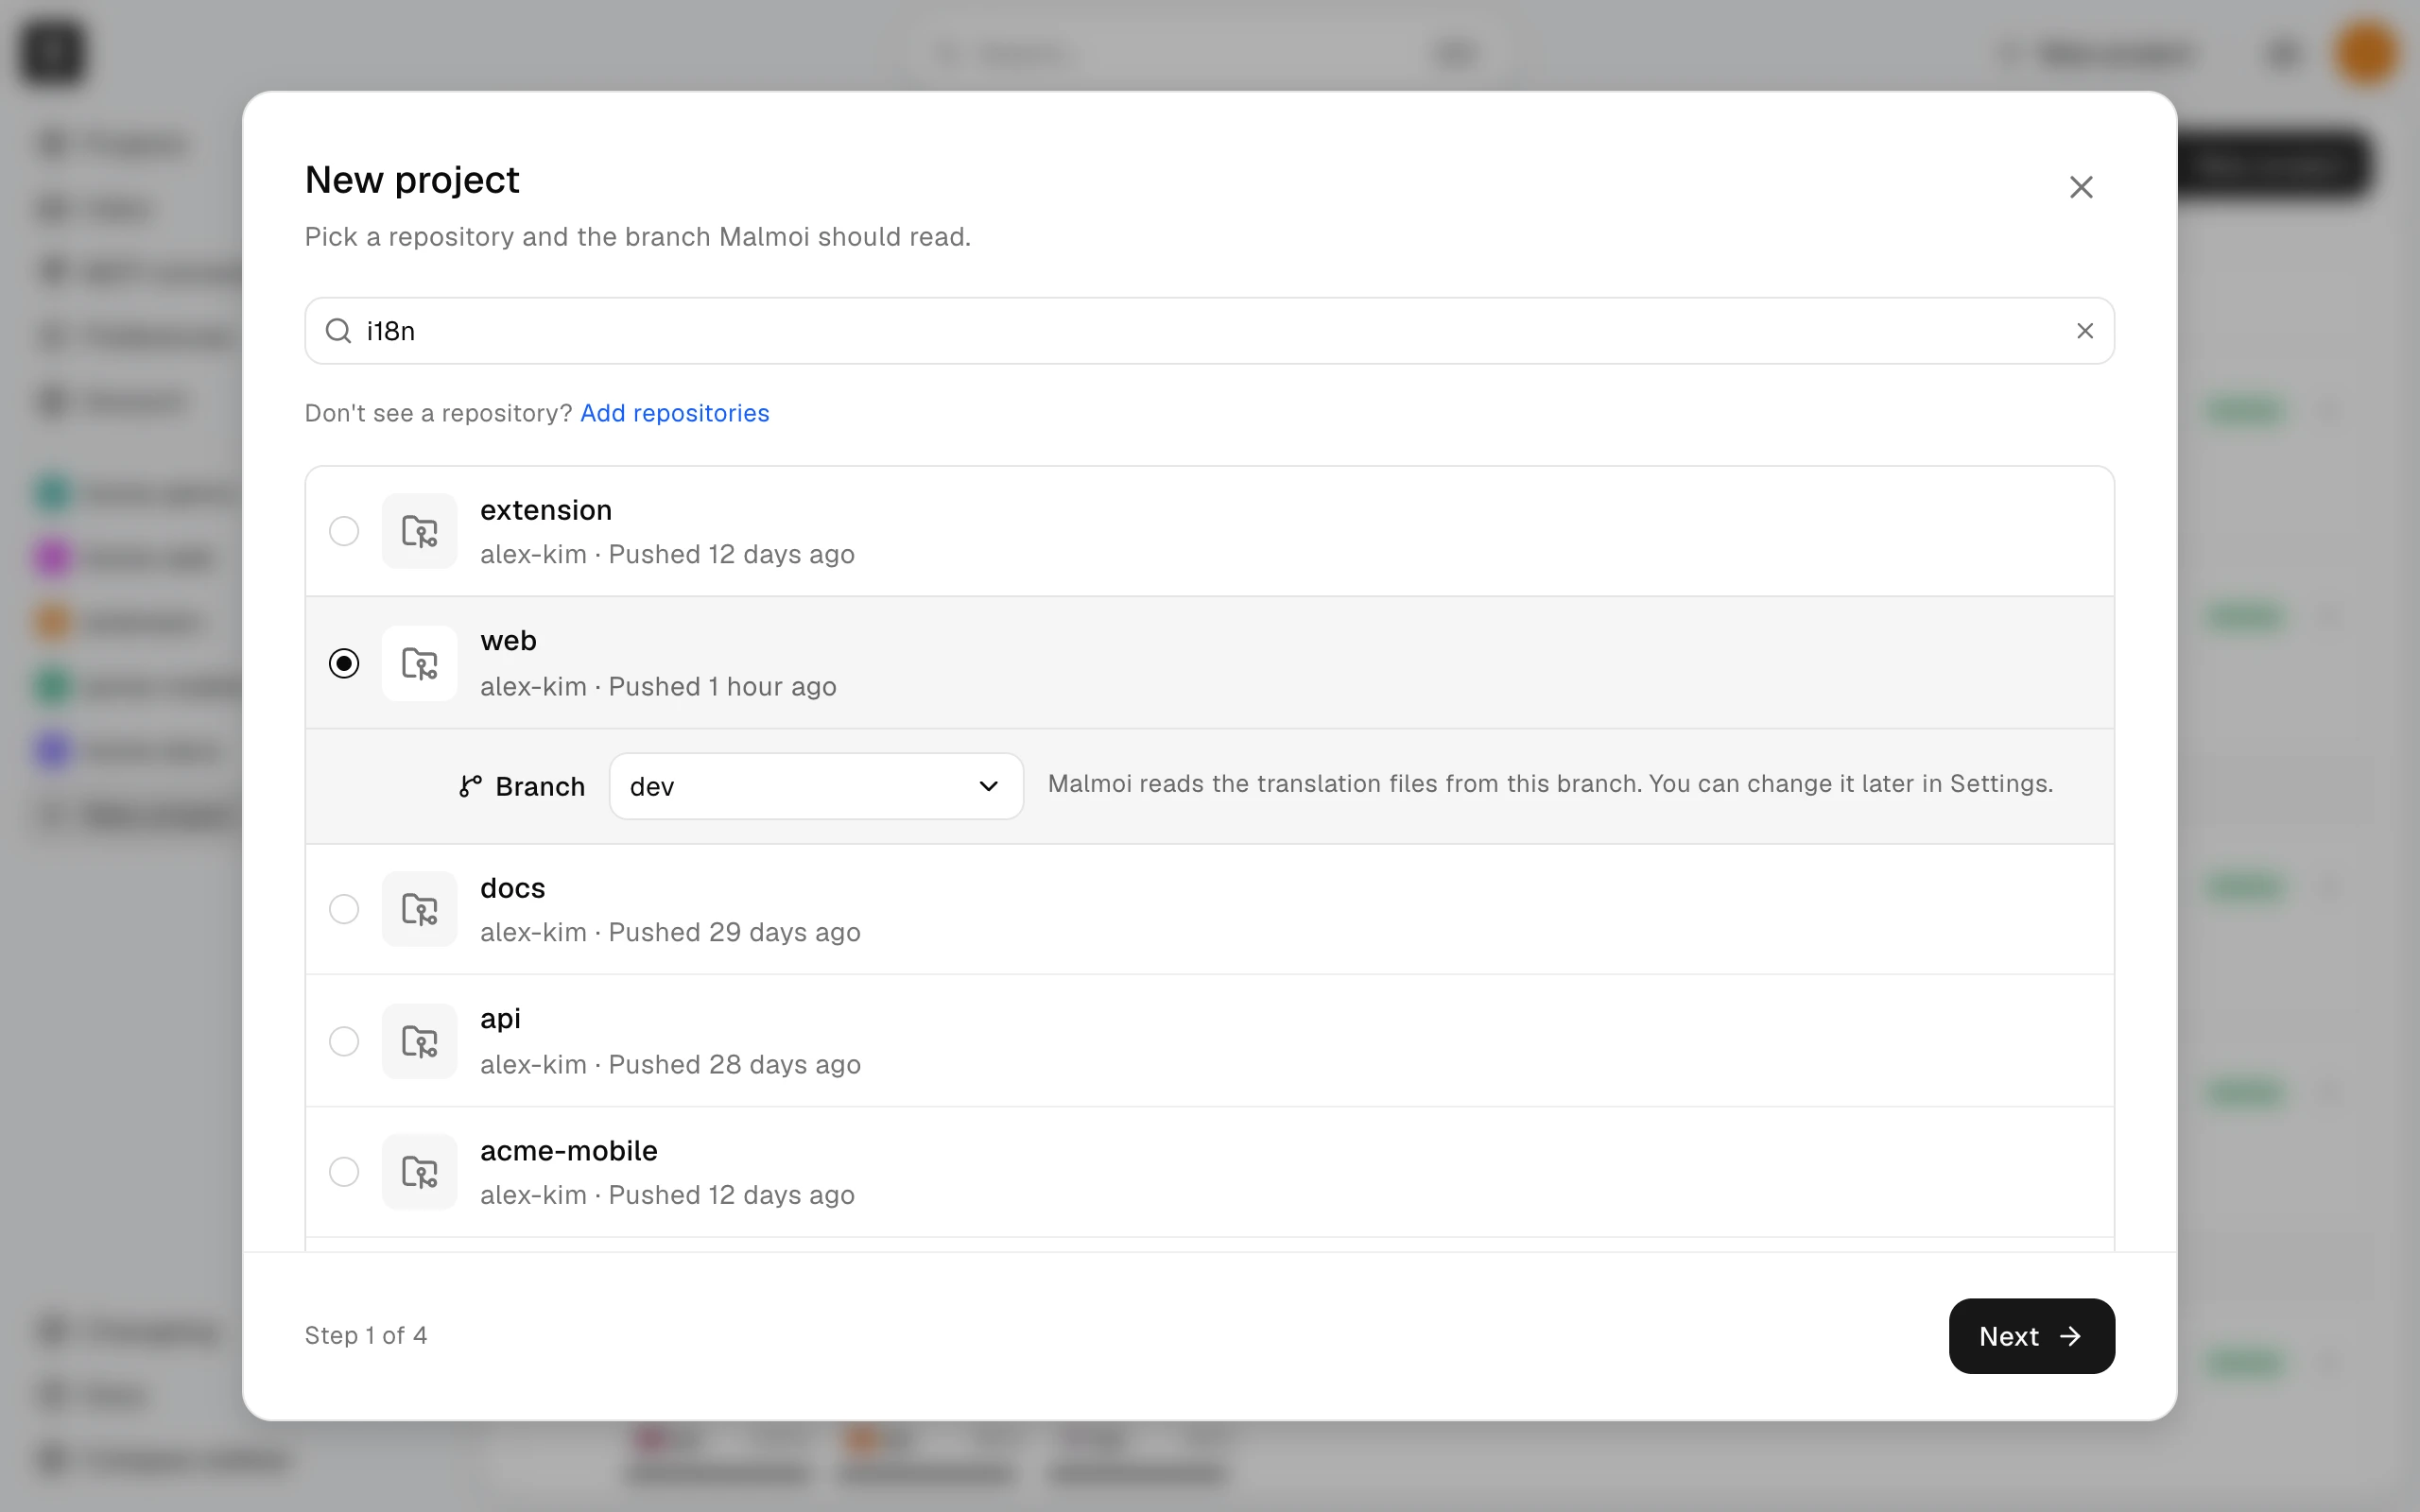
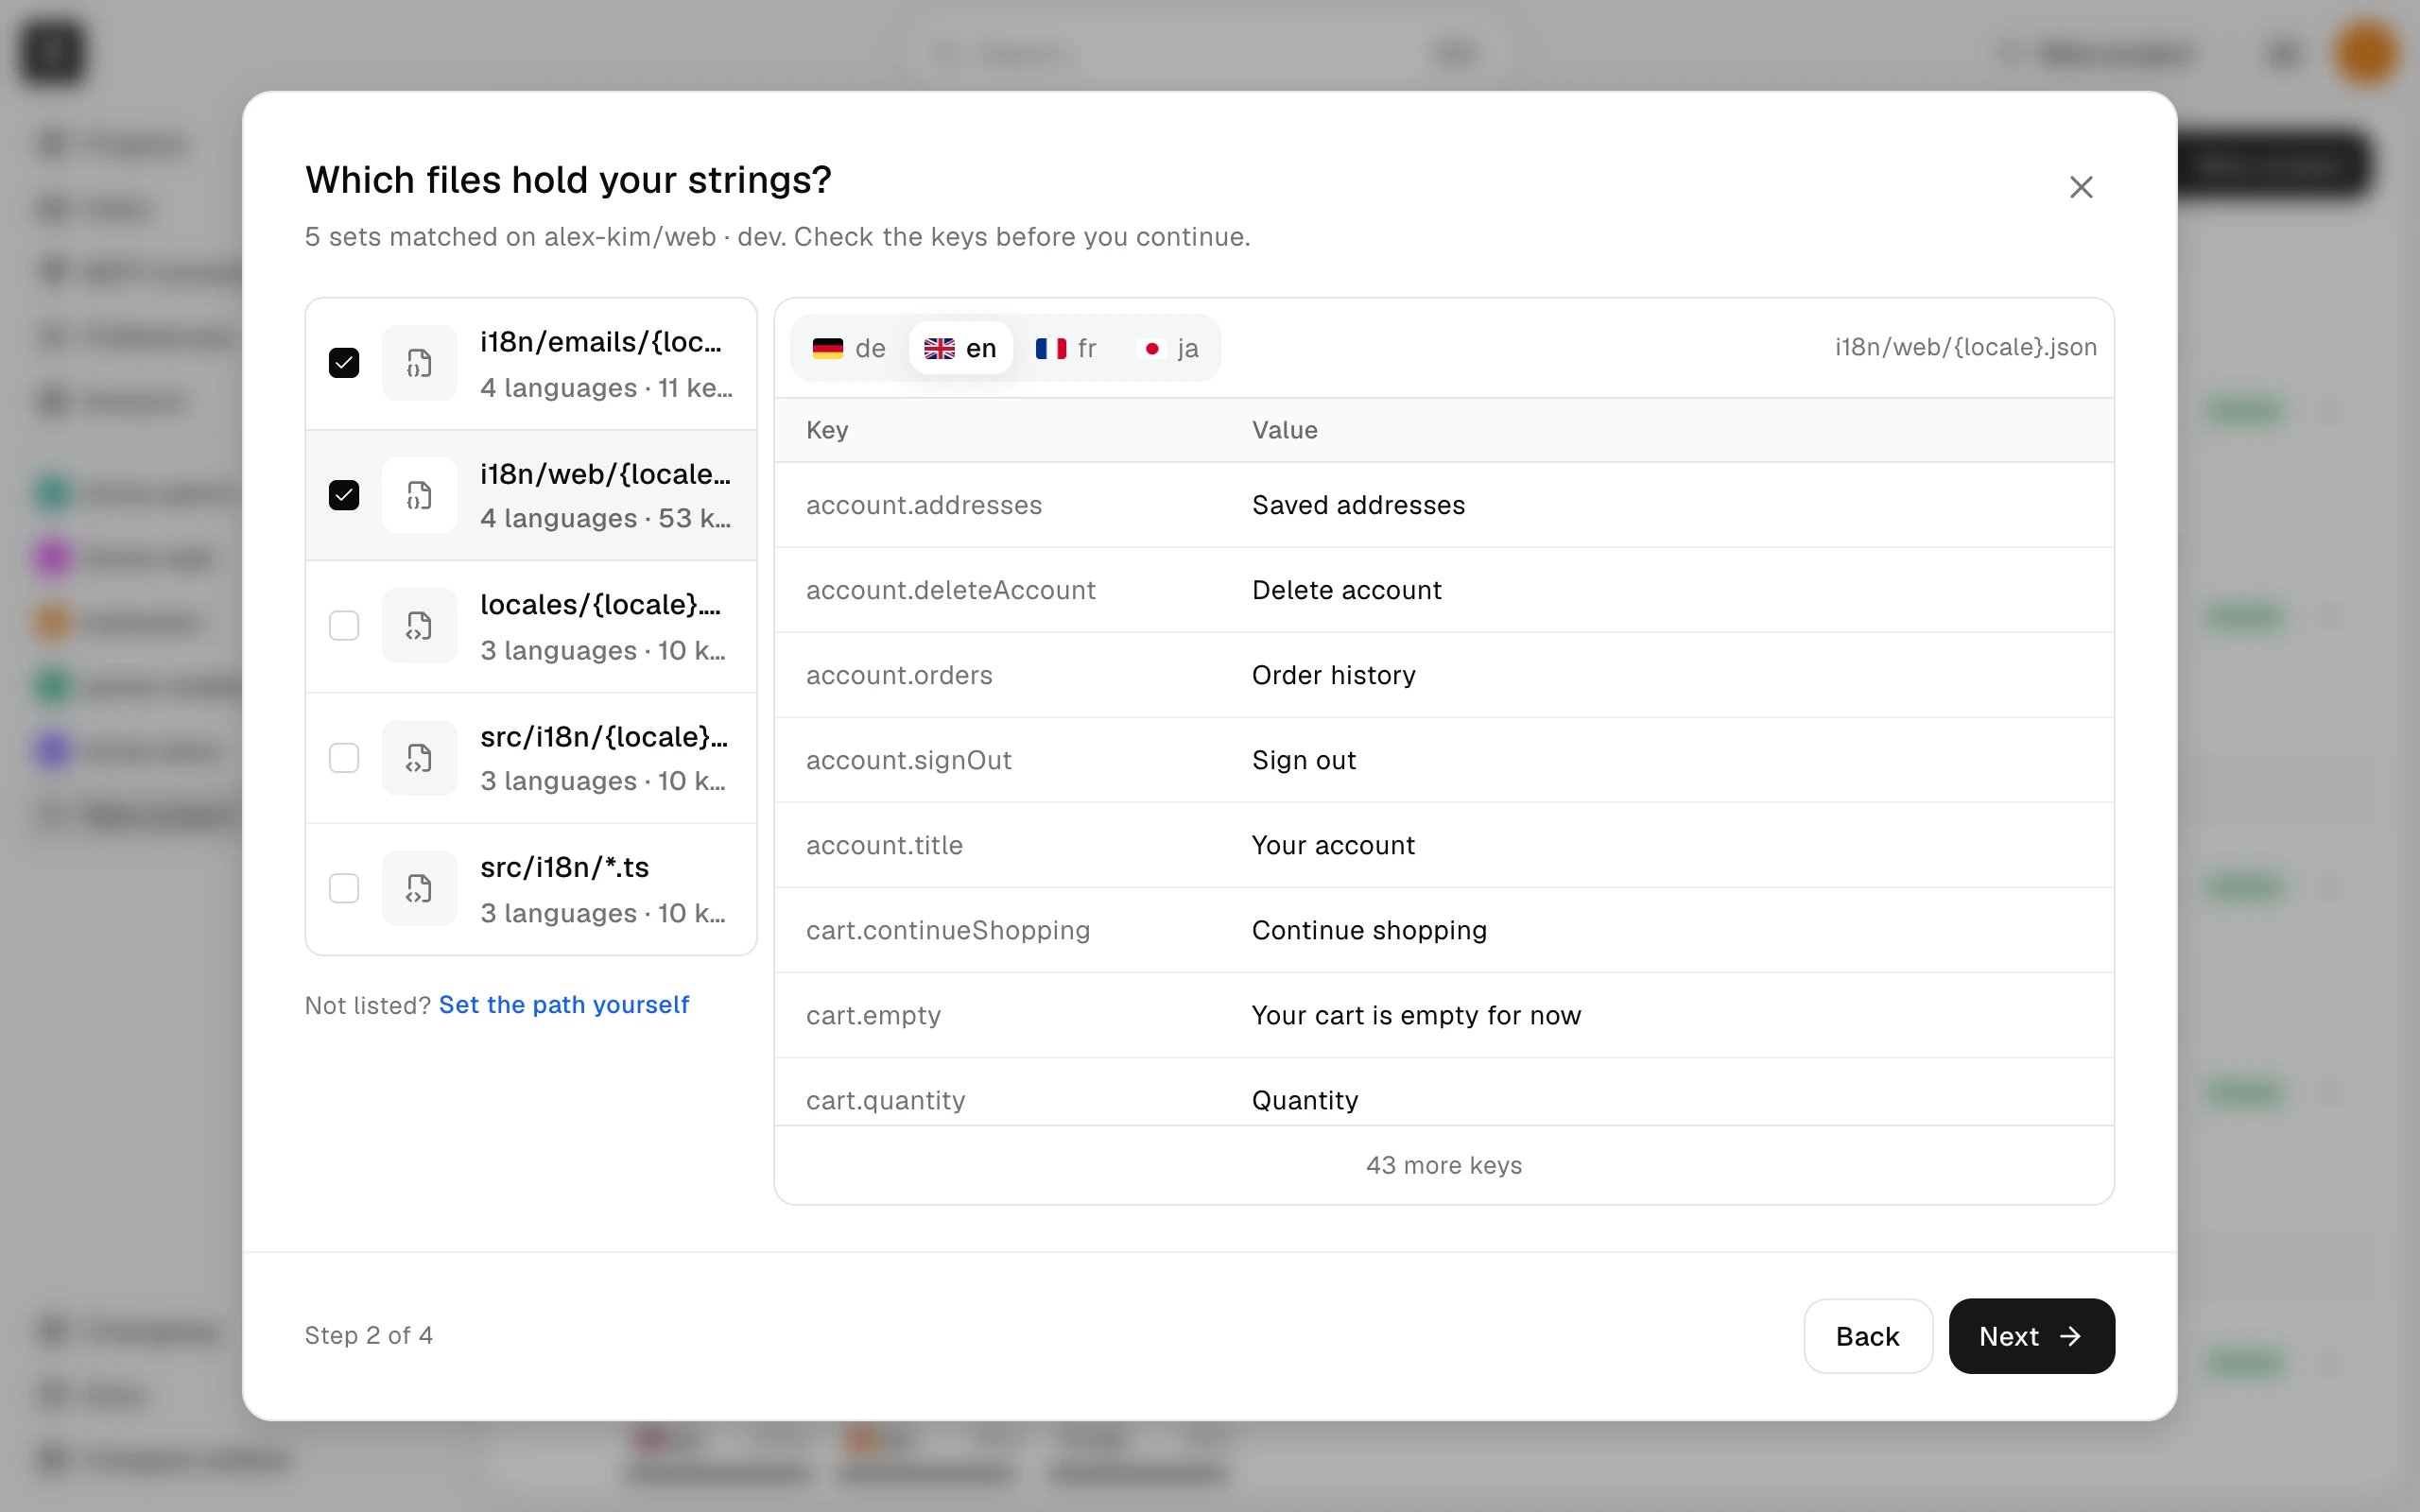
Choose files
- Select the detected files. Files with a single language are supported.
- If your files are not detected, choose Set the path yourself and enter a supported path and format. See Supported file formats for path examples.
- Review the preview, then choose Next.
Malmoi shows one source for each selected set of files. A source can use a different base language from another source.
Fill in project details
- Check each source's Base language. Its file decides which keys exist; keys found only in another language are left out.
- Enter the project Name and Address. The address is the name in the project URL; it must be globally unique and cannot be changed later.
- Review the file and size limits in Limits, then choose Create project.
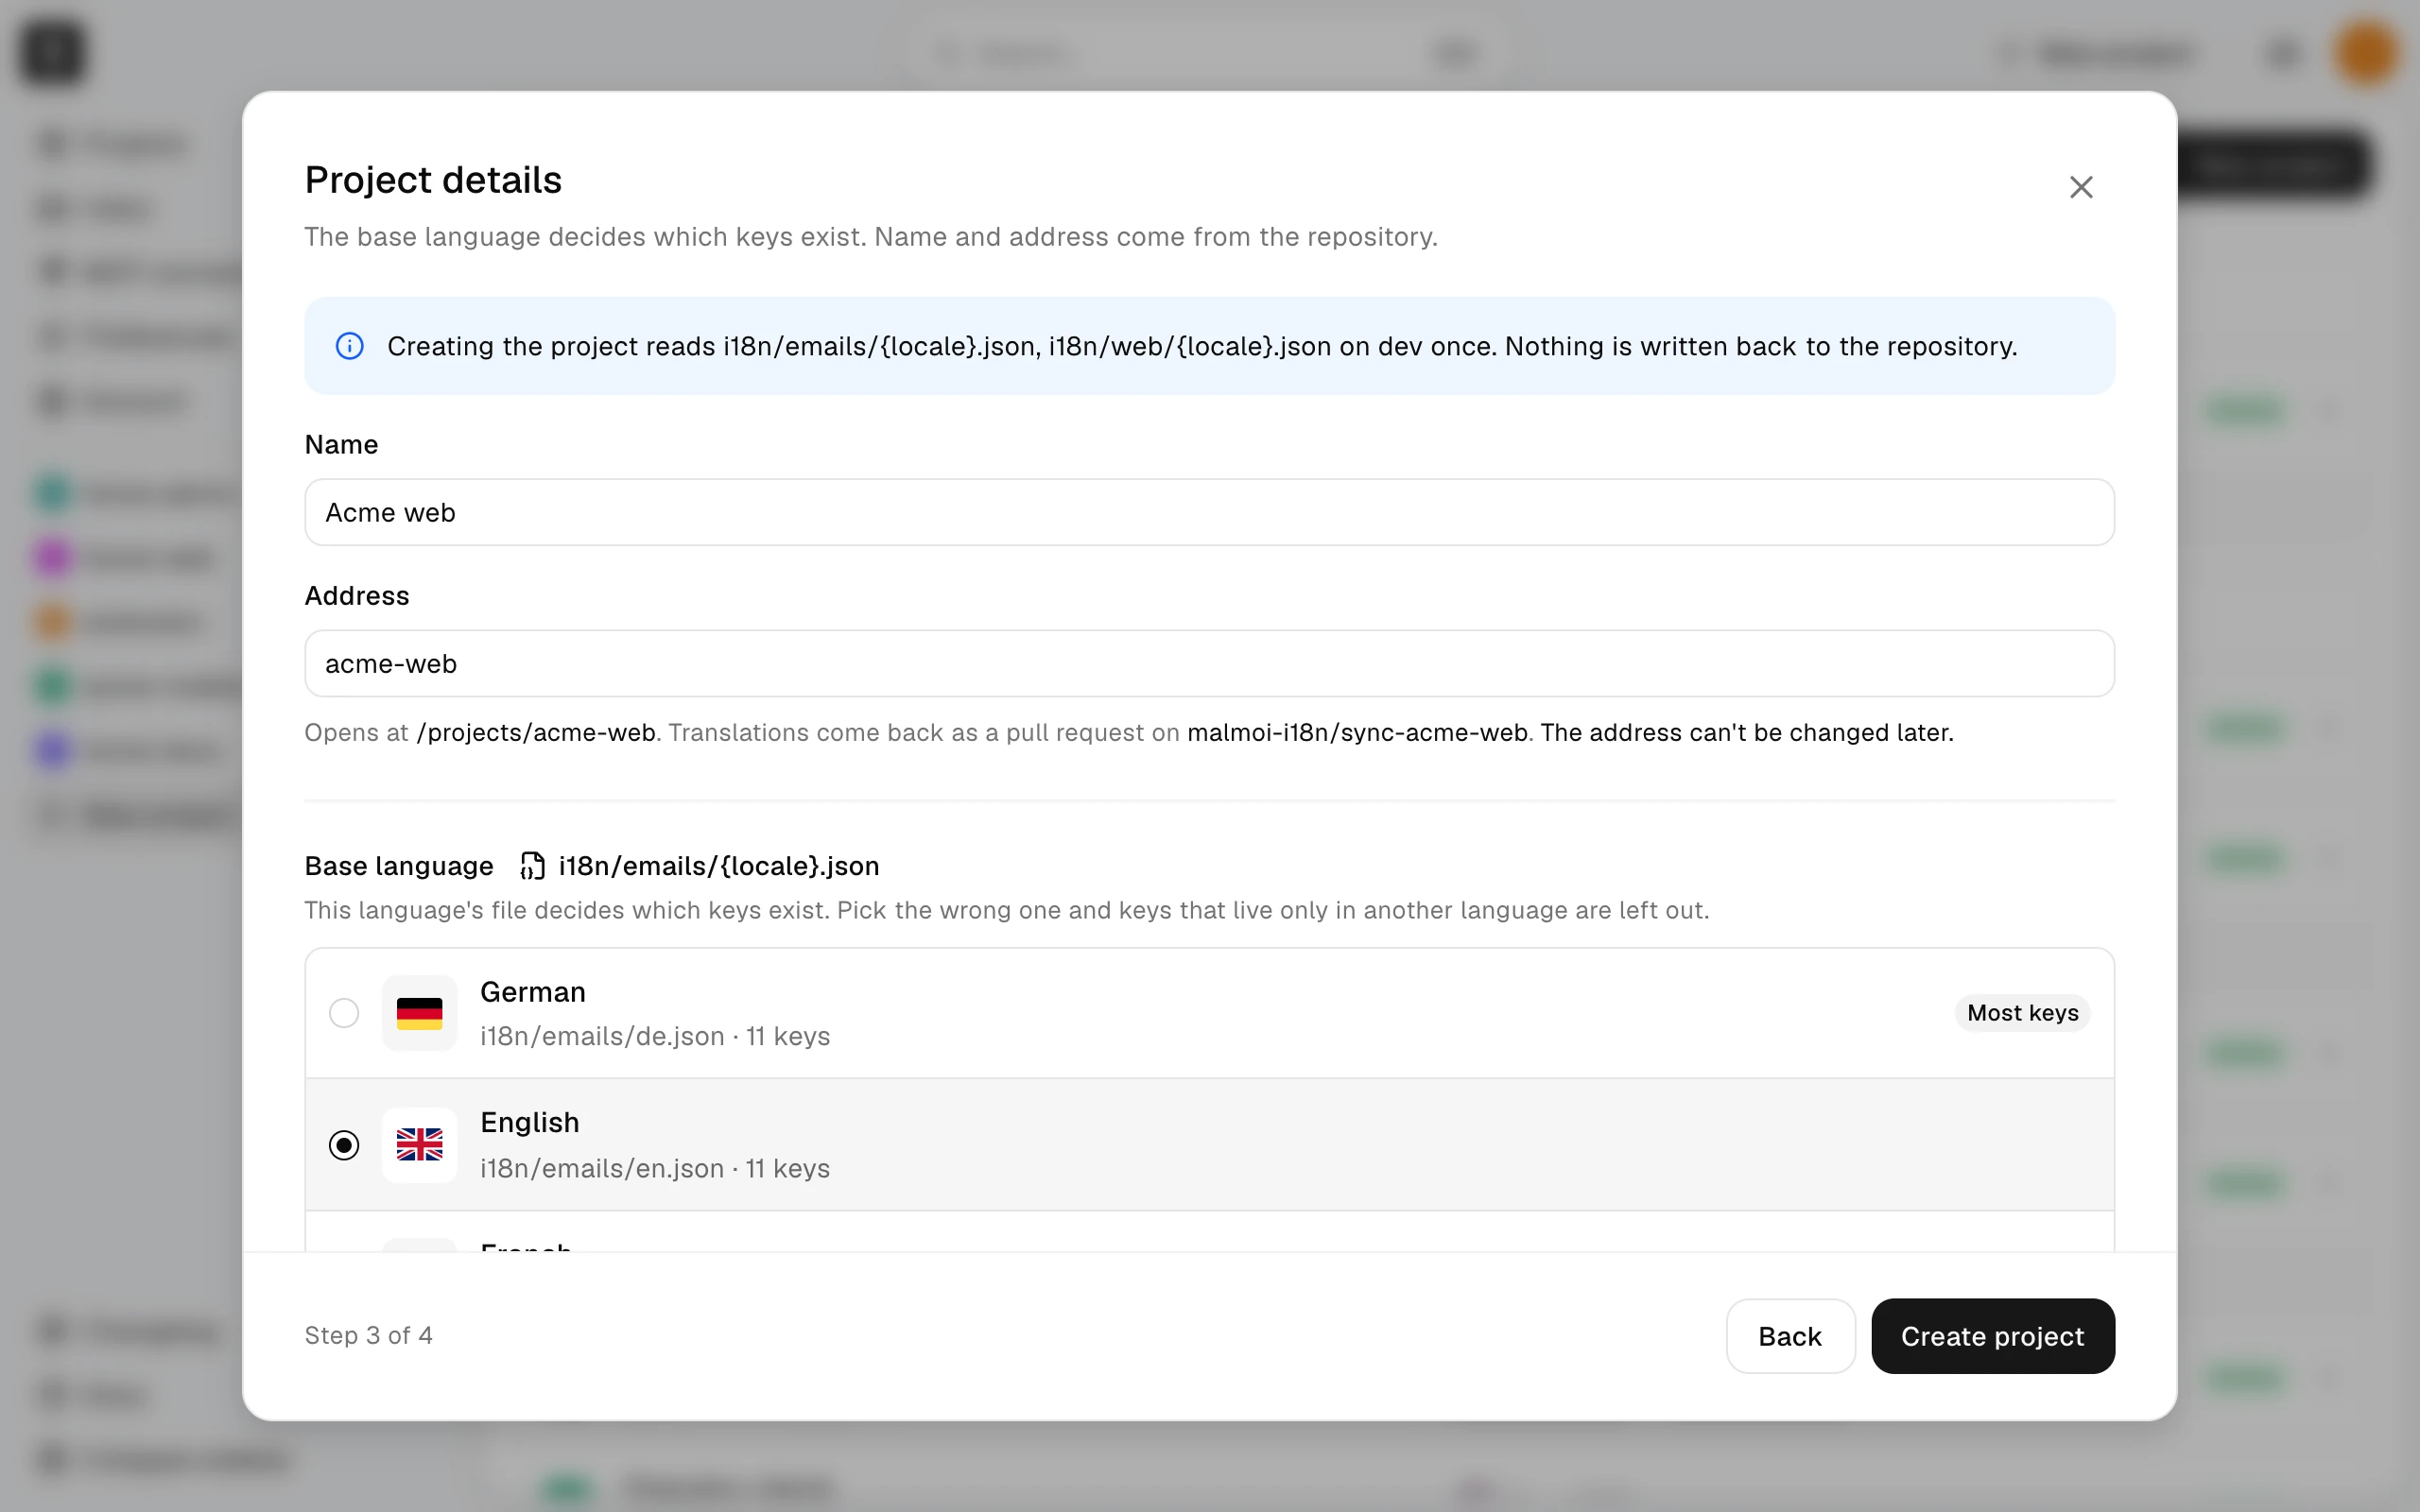
The project is ready immediately. The last step says Malmoi is ready, and you can translate and invite teammates right away.
Finish setup
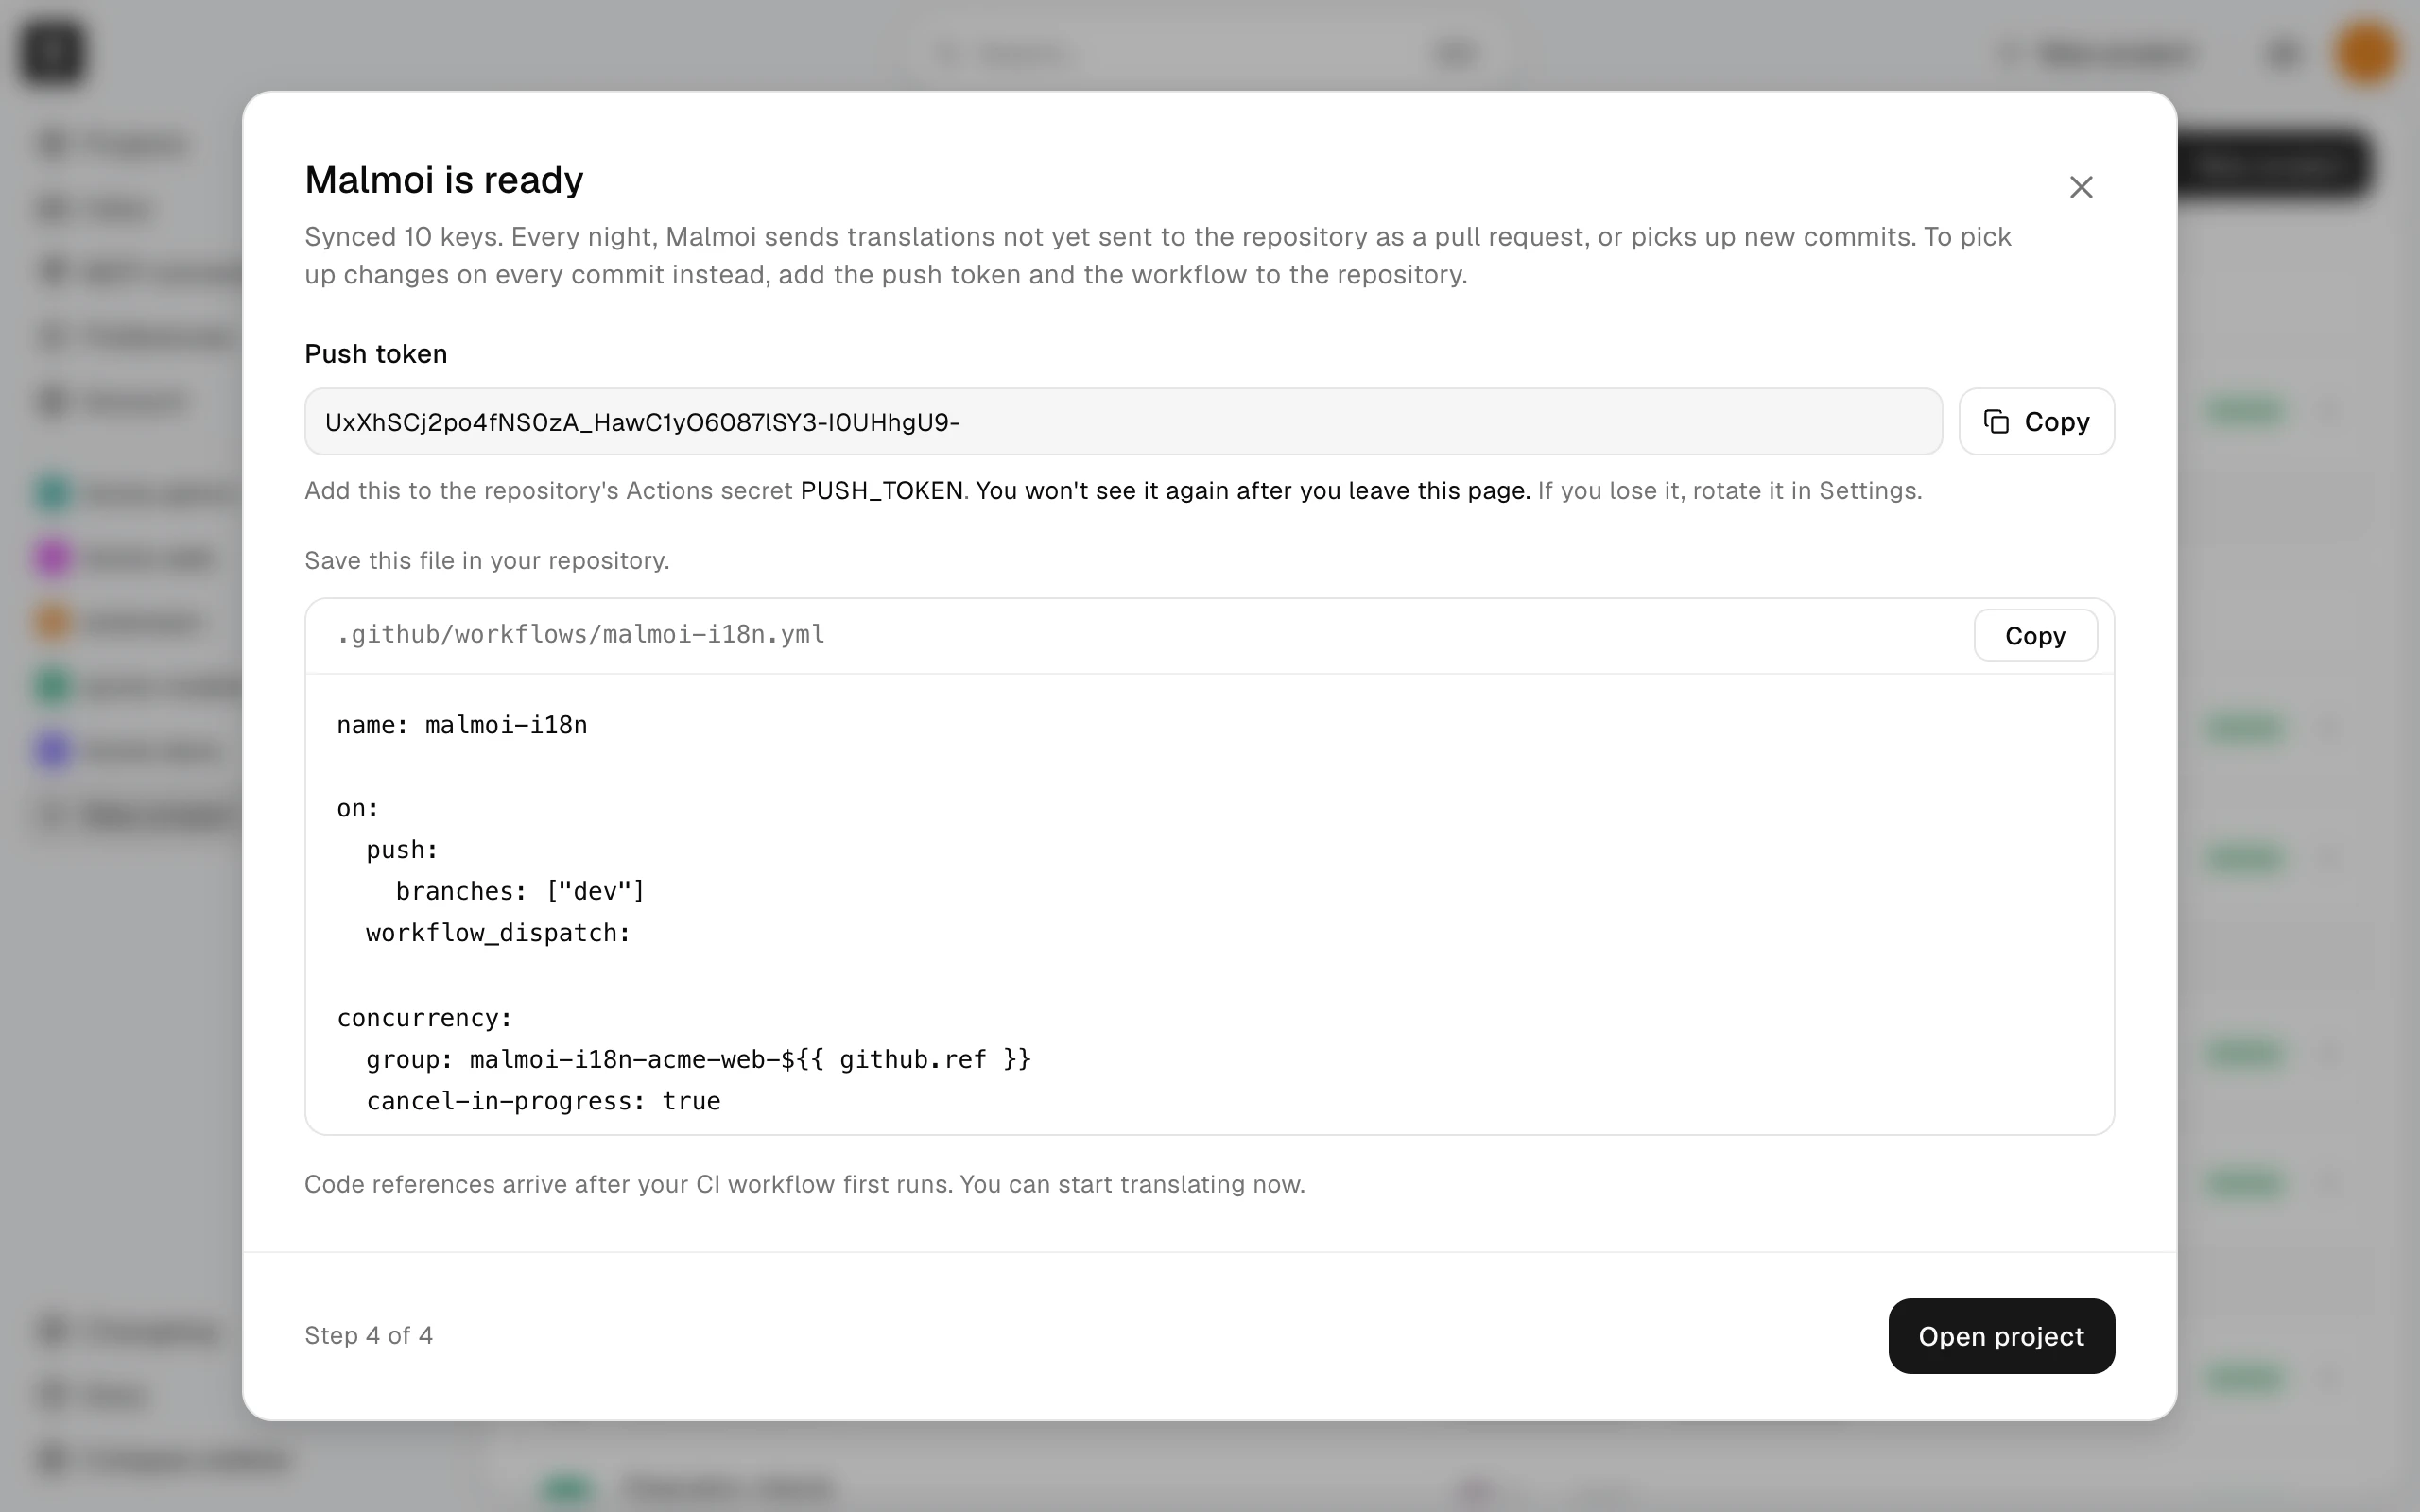
- Copy the push token shown on the ready page. It is shown once; rotate it later in Settings if you lose it.
- Add the workflow and secret by following Add the workflow.
- Choose Open project to go to the project's Home page.
The creator becomes Owner.
What happens next
The nightly run keeps the project current once a day, with or without the workflow. The workflow updates it on every commit and adds code references after its first run. A failed workflow does not make the project unready.